Installing self-adhesive smart film - the complete guide
The full factory process: handling, cutting, busbar (electrode) work, wiring and power-on testing. Every order ships with this guide - and remote engineer support if you get stuck.

What the finished install looks like
An office partition retrofitted with self-adhesive smart film, switching between open and private.
- Under 0.1 s switching - clear to frosted the instant power changes
- ~5 W per m² - less power than a light bulb, only while clear
- Factory-cut to size - busbar finished and tested, ready to wire
Before you start
Safety first: electrical work must be completed by a certified electrician. Read this guide in full before commencing installation.
- Cut the film to size as needed (or order factory-cut, tolerance ±2 mm)
- Inspect quality: no pinholes, delamination, drip marks or surface taint
- Clean the worktop - no dirt, impurities or raised objects
- Tools: tape measure, oil pen, square ruler, scissors, alcohol, dust-free cloth
1. Handling and moving the film
The film is hard enough to work with but must be handled gently - never bend it. Roll it to a cylinder holding the edge and pushing forward; one hand holds the edge, the other holds the roll at its 1/2-2/3 position. Unfold slowly, following the roll. To overturn, hold both sides 40-50 cm above the worktop and flip slowly. Wipe the surface only with a dust-free cloth.
2. Cutting
Get a right angle with a square ruler, measure and mark the size, then cut on the cutting plate - one piece at a time, no hands on the plate. Required accuracy: size error ±2 mm, diagonal error ±3 mm. Avoid trimming below 3 mm to keep the knife from wandering. After cutting, wipe the knife edge with an alcohol cloth.
3. Busbar (electrode) position rule
Which side gets the busbar depends on the length-to-width ratio: for pieces longer than 3:1, apply electrodes on one long side or on two short sides - a single short-side busbar cannot power the entire piece and transparency suffers. We position the busbar correctly on every factory order.
4. Electrode (busbar) work
The electrode is built from copper foil tape, conductive silver ink and connecting wire on the ITO film edge:
- Open the two film layers with an electrode knife at 45°, wipe the area with alcohol - one direction only
- Silk-screen the silver paste (3 mm line, cured), then stick the copper foil over it
- Solder the electrode wire to the copper foil - soldering iron under 2 seconds per point
- Protect the finished electrode with 10 mm transparent tape; seal corners with 3 cm paper against delamination
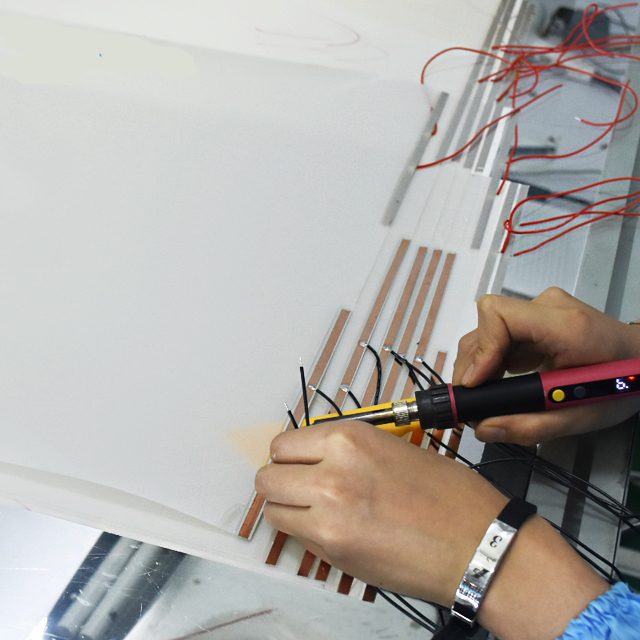
Ordering factory-finished film? Skip this section entirely - your busbar arrives wired and tested.
5. Power-on test before mounting
Test each piece with the 60V supply and check for sparking, folding marks, delamination and white spots. Verify the film switches fully clear and fully opaque. Only then proceed to mounting.
6. Dry-mount onto the glass
- Clean the glass with alcohol and a lint-free cloth, let it dry fully
- Peel the backing, align the top edge first and lay the film onto the dry glass
- Squeegee from center outward to press out air bubbles - no water needed
- Wire the busbar to the transformer output (parallel within a zone)
7. Wiring and transformer
One transformer per independently switched zone, sized at roughly 50W per 10 m². We calculate the exact wattage in your quote. For app, voice or scheduled control add the app control module per zone.
Want it plug-and-play?
Order factory-cut film with finished busbar and pre-sized transformers - you only mount, wire and switch.